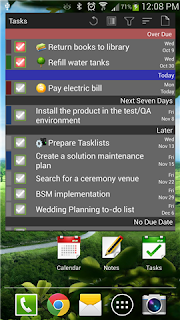
- You can download the vcTasks app (
 ), and sync the Google tasks to this app and keep them separated from VCO Tasks App.
 - You can also configure VCO to sync with Google Tasks on Google Cloud so that you can sync tasks between Outlook, VCO Pro Tasks app, and Google Tasks
Remark:
- You should use either one of these options above, but not both.
- You need Google Play Services to sync with Google Tasks.
- You must have VCO with build version 270 or above.
Here are the steps to sync with Google Tasks in VCO Tasks App:
- Please purchase vcTasks Key For Premium from Play Store (We are doing BIG discount for VCO Users at this moment, it's only AUD 0.99).
- Start the vcTasks Key For Premium app to activate the license.
- In VCO Tasks App menu, you should see a new option called 'Sync Google Tasks'.
- Select 'Sync Google Tasks', and select the Google account that you want to sync with. You can sync with multiple Google accounts. But during setup, you can only register one Google account each time.
- Then , click the "Sync Now" button (
 )to start the sync process.
 - Once you have registered the Google account, you should see a sync button on the top right of the screen. You can click the sync button to trigger the sync manually.
- After you have synced with Google Tasks, you should see a list of task lists in the task lists dropdown option. In the task lists dropdown option, you should see the "All Tasks", "Local Tasks", and all the task lists on Google cloud.
- If you want to create a task under a specific task list, please select that task list from the task list option, and click the "Create Task" button or use the "Quick Tasks" option.
- If you create a task under the Google task list, the task will be synced to Google in the next sync process.
- If you create a task under the "Local Tasks" list, the tasks will not be synced to Google cloud
Therefore
- If you want to create a task that synced between Outlook, VCO Tasks App and Google cloud, you should create a task under a Google task list.
- If you want to create a task that only synced between Outlook and VCO Tasks App (but not Google cloud), you should create the task under a "Local Tasks". - After the task is created under any of the Google task list, the tasks will be synced to Google cloud automatically in about 5 minutes. (when the autosync process is started, it will check if the screen is and WiFi is enabled. If it's not (for example you are using the phone, or there is no WiFi connection), it will skip and wait for another 5 minutes. If only mobile data is enabled, the autosync process won't start. This is to protect your phone data usage.
- If you want to sync the updates to Google cloud immediately, you can also click the "Sync" button on the top right to start the sync immediately. If you start the sync manually, it will sync either you have WiFi or Mobile data enabled.
- By default, when you sync tasks from Outlook to VCO, it the tasks will be synced to "Local Tasks" only. It won't be synced to Google. However, you can set a Google task list as default task list in VCO Tasks App. Once the Google task list is set at default, all the tasks that synced from Outlook will be created in this task list and will be synced to Google Tasks automatically.
- To set a task list as default, select the task list from the task list dropdown option. Then, select "Set as Default Task List" option (
 ) from the menu.
 - If you want to move existing tasks to a Google task list, please read this post "Move tasks between task lists".
- By default, the autosync process should be run in about 5 minutes after you have updated/created or deleted any tasks in VCO Tasks App, or during the day end process (at about 00:05). If you want to stop the autosync process (for whatever reason) you can uncheck the checkbox "AutoSync" in the "Sync Google Tasks" account selection screen.
- While the "AutoSync" is disabled, you can still start the sync process manually using the "Sync" button in the VCO Tasks screen (
 ).
).
More:
Screen Captures for References:
 |
| Select "Sync Google Tasks" |
 |
| Select A Google Account to Sync With |
 |
| The Task List dropdown list shows a list of task lists |
 |
| If you select "Manage Task Lists" option, you can create, rename or delete task list. (Remark, this action will be synced to Google) |

.png)


.png)